Easy, High-Quality Rolling Credits
As video editors, every new editing trend can be a struggle to keep up with, especially when working to meet tight deadlines and keep up with the latest techniques.
Luckily, we can count on one industry constant, rolling credits – a classic element in film and broadcast has been a staple in tv shows, documentaries and now web videos as a means to credit everyone involved in a production.
Unfortunately, such a staple element of any production has been historically and notoriously difficult to create. Currently, methods include time-consuming methods involving Adobe Premiere or more advanced and convoluted custom After Effects actions.
Creating rolling credits is always my least favorite part of the editing process, luckily Titler Pro has made it easier for me to quickly create high-quality titles. This is especially helpful in creating clean, flicker-free motion that rolling credits typically struggle with.
Typically, rolling titles suffer from “inchworming” and flickering – jittering issues caused by scaling or keyframing a credits roll.
Titler Pro’s algorithm analyzes the size of the picture and moves text in increments that match, making smooth rolling credits. I had not had the ability to create quality rolling credits as smoothly and easily before inside my video editor.
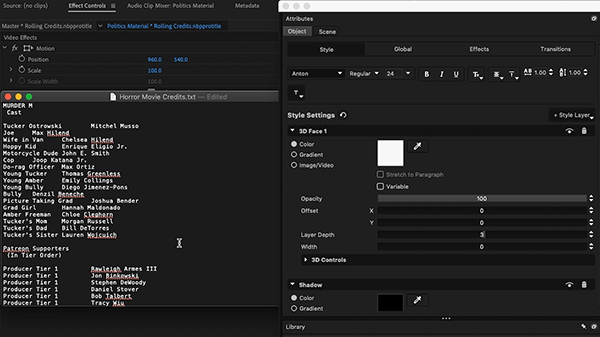
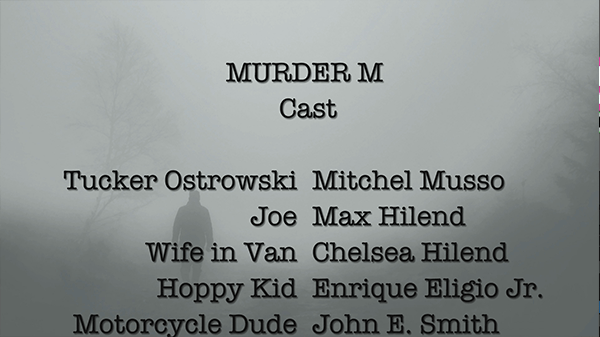
I can simply take a plain text file with the list of my cast, crew and production members and paste it in a template I created. Creating this template was a rather straightforward process as well.
Titler Pro simply asks you to place your text paragraph at the center top of the workspace and click on the rolling credits box in the Object tab under Global to enable the feature. From here, all I had to do was paste my text and style some of my credits to get the look I’m going for.
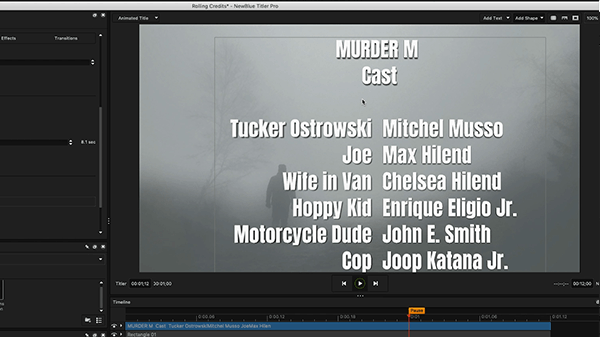
Then, I needed to adjust the newly enabled slider to set the speed I want my crawl to go. I was surprised at how intuitive it actually was to get something usable so quickly.
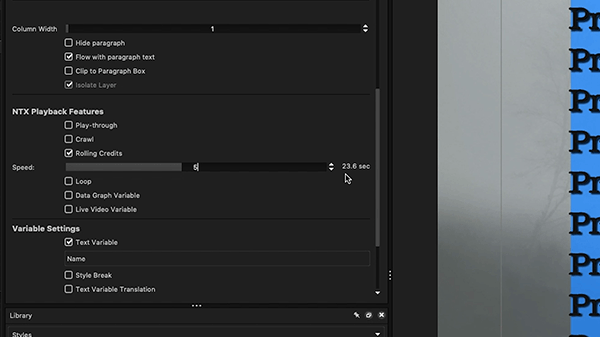
I’ve set my example to 23.6 seconds, which is how long it will take the bottom line of text in my credits to reach the top.
This is great for me because I can focus on getting the information and look of the credits just right and spend less time wrestling with flickering, extraneous programs and outdated processes.