Titler Pro 6 makes creating remarkable titles easy. Start with any of the over 200 built-in styles and templates and quickly make a title your own by customizing it inside the Title Designer. Titler Pro 6 is compatible with all major video editing platforms so you can further augment your design right within your favorite non-linear editor.
In this tutorial, Rafael R. Meneses, director of the upcoming NewBlueFX film Scrub, will show you how to create a stunning title by using one of the included templates from Titler Pro 6.
Watch now:
Step 1:
Open Titler Pro 6 by launching it as a standalone application or by adding it as a source within your video editing application of choice. In this tutorial, Rafael is using After Effects.
In addition to After Effects, Titler Pro 6 is compatible with Avid Media Composer, Adobe Premiere Pro, Apple Final Cut Pro, Grass Valley EDIUS, DaVinci Resolve, MAGIX Vegas Pro, MAGIX Vegas Movie Studio, and MAGIX Video Pro X.
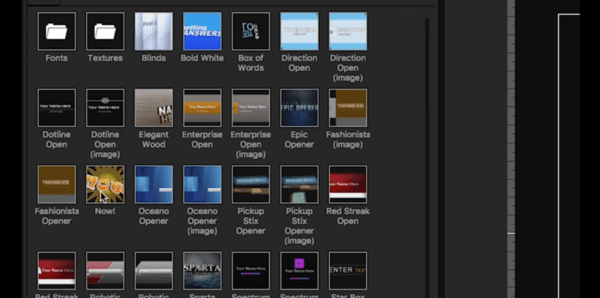
Once inside Titler Pro 6, navigate to the Library, open the “Main Titles” folder and select the “Now!” template.
Step 2:
On the Star layer, click on the arrow next to the eye icon to reveal the drop-down menu. Then delete the transition within the layer. Repeat this step on the NOW! layer.

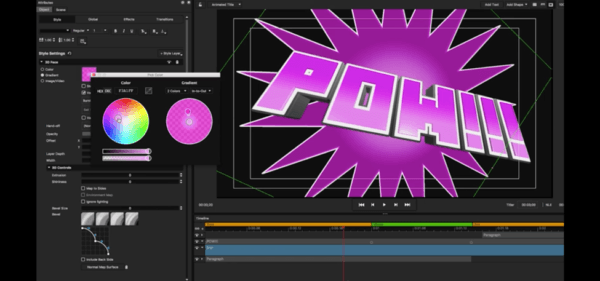
Step 3:
Click on the “NOW!” layer and change the text to say “POW.” Then navigate to the “Style” tab to change the font (in this example, Rafael is using the Minecrafter 3 font). You can also change the color of the font and the star from this location.
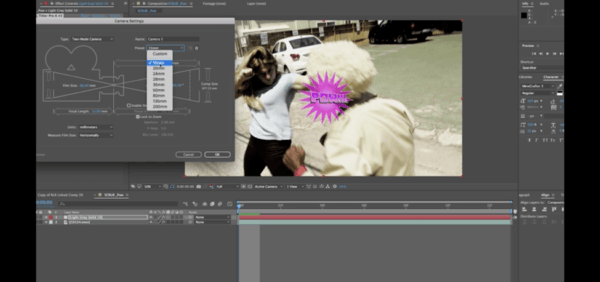
Step 4:
Jump back to After Effects and right click on the grey area to add a Camera to your project. Select the 15mm preset and click OK.
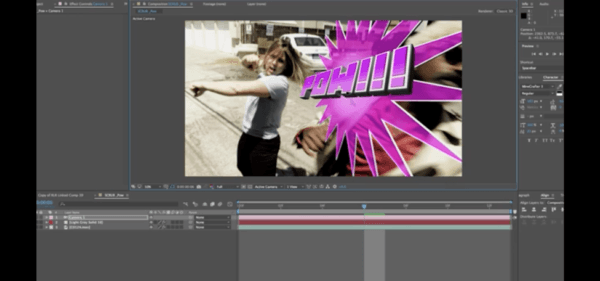
Step 5:
Change the orientation of the camera by hitting the “C” key on your keyboard and dragging to the desired position. Scrub your timeline to find the location where you want the title to appear and adjust to your liking.
Step 6:
To reveal your keyframes position, select the “P” key on your keyboard. Then, add a keyframe where you want your title to end. Next, go to the point in your video where you want the title to begin and then zoom the title out and add a new keyframe.
That’s it. Play the title back and POW!, you’ll have a knockout title in no time!
To learn more about Titler Pro 6, including upgrade paths from older versions of Titler Pro, please visit https://www.newbluefx.com/products/titling/titler-pro/.